
The trick to OE is that it ships as a collection of instructions, called ‘recipes’, which fetch each package from the right place, apply the necessary patches, build it, package it, and prepare an image. It builds its own toolchain, which takes away one of the big headaches of embedded development, and packages up an entire cross SDK we can use to build further applications and deploy them onto target hardware.
In this blog post, I’ll bring up a minimal system under emulation, to get a feel for the system without having to commit to hardware.
Getting Yocto/Poky
Early on, I was advised by the oe-core mailing list, to start with The Yocto Project. From what I can tell, Yocto provides a stabilization point in the vast, fast-moving soup of OE recipes, plus documentation and testing. That is, it gives us a stable starting point.Let’s start with the Denzil release of the tools, available from the Yocto Download page.
One thing to note in the Yocto world is that the thing you download is actually called ‘Poky’. The exact difference between Poky and Yocto is not established in a clear way that understandable to outsiders. The nearest way I’ve found to approximate the terms is to use ‘Yocto’ when referring to the organization (like one would refer to ‘Canonical’), use ‘Poky’ when referring to the actual bits downloaded (analagous to ‘Ubuntu’), and ‘Denzil’ is the release (like ‘oneric’).
Here’s how we download the files and get them ready. This is running on Ubuntu 12.04, and of course you could put these files anywhere convenient:
$
cd ~/Source/Yocto
$ wget http://downloads.yoctoproject.org/releases/yocto/yocto-1.2/poky-denzil-7.0.tar.bz2
-O - | tar xjv
$ source poky-denzil-7.0/oe-init-build-env
poky-denzil-7.0-buildThe last line above is critical. It sets up the environment for any future commands.
From here on, it’s helpful to following along with The Yocto Project Quick Start.
Configure
Within the build directory, under ‘conf’, is a critical file, ‘local.conf’. It stores configuration settings that affect the entire build. The basic thing to change here is the machine we’re building for, in this case ‘qemuarm’. While we’re at it, we can increase the number of threads and parallel make options, to build faster.MACHINE
= "qemuarm"
BB_NUMBER_THREADS = "2"
PARALLEL_MAKE = "-j
6"Fetch & Build
There are numerous different images we can build. Here, we’ll start with a simple one, ‘core-image-minimal’. This is just enough to get a useful command line up.I prefer to fetch and build in two different steps to keep tabs on the performance of my machine. I did in-fact purpose-build my machine for fast compile times
$
bitbake -c fetchall core-image-minimal$
time bitbake core-image-minimal
real 34m26.539s
user 86m48.430s
sys
12m14.182sRun It!
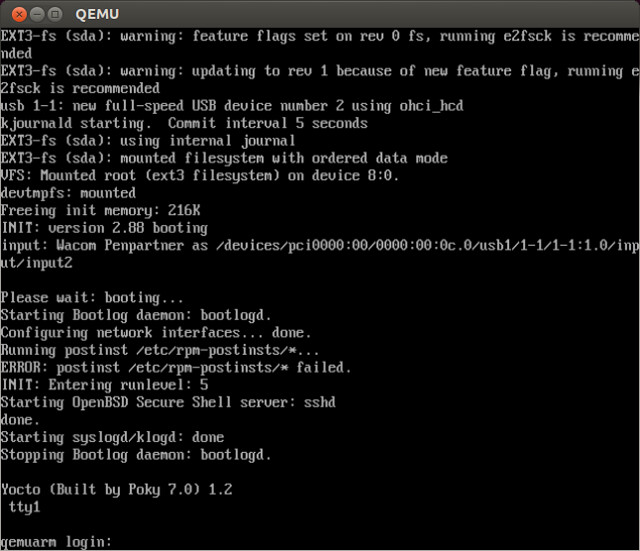
Now we can run our vanilla image. This tells us all is well with our download, and from here we can start customizing our image.$
runqemu qemuarmNext Steps
That’s all it takes to get the basic system up. Not bad! My hats off to the Yocto guys getting a stable, reliable, and powerful build put together.Beyond just getting started, there are a handful of really useful things we can also do:
- Set Up SSH. We’ll want to access our ‘machine’ remotely to move files over, and prepare for the day when we’re running real hardware which is not connected directly to our development machine.
- Cross-Develop Applications. A linux machine by itself isn’t that useful until we’ve got it doing what we want. Chances are, this requires building apps on our development machine and running them on the target hardware.
- Optimization. Poky builds things out of the box that we don’t necessarily need, so it’s good to know how to reduce the footprint further so as to reduce the cost of the final product.
Set Up SSH
Adding a SSH server to our image is pretty simple, and highlights the general ease with which existing packages can be added into the minimal installation. The basic idea is to edit our image reciple, meta/recipes-core/images/core-image-minimal.bb, and edit the IMAGE_INSTALL line to add task-core-openssh. Now it looks like this:IMAGE_INSTALL
= "task-core-boot task-core-ssh-openssh ${ROOTFS_PKGMANAGE_BOOTSTRAP}
${CORE_IMAGE_EXTRA_INSTALL}"The solution is to add a user’s public keys to the image, and to generate server keys and add those into the image as well. This will be an excellent way to learn how to modify an OE recipe! The file we need is the openssh recipe, meta/recipes-connectivity/openssh/openssh_5.9p1.bb.
First, we increase the revision number of the recipe, because we’re changing the contents
@@
-7,7 +7,7 @@ SECTION = "console/network"
LICENSE = "BSD"
LIC_FILES_CHKSUM
= "file://LICENCE;md5=bae9a689be41581503bcf95d8fb42c4e"

-PR =
"r3"
+PR = "r4"@@
-22,6 +22,7 @@ SRC_URI =
"ftp://ftp.openbsd.org/pub/OpenBSD/OpenSSH/portable/openssh-${PV}.tar.
file://nostrip.patch
\
file://sshd_config \
file://ssh_config \
+ file://sshd-keys.tar
\@@
-81,6 +82,12 @@ do_install_append () {
mv ${D}${bindir}/ssh
${D}${bindir}/ssh.${PN}
rm -f ${D}${bindir}/slogin
${D}${datadir}/Ssh.bin
rmdir ${D}/var/run/sshd ${D}/var/run ${D}/var
+
install -m 0600 ${WORKDIR}/ssh_host_dsa_key ${D}${sysconfdir}/ssh
+ install
-m 0600 ${WORKDIR}/ssh_host_rsa_key ${D}${sysconfdir}/ssh
+ install -m 0600
${WORKDIR}/ssh_host_ecdsa_key ${D}${sysconfdir}/ssh
+ install -m 0644
${WORKDIR}/ssh_host_dsa_key.pub ${D}${sysconfdir}/ssh
+ install -m 0644
${WORKDIR}/ssh_host_rsa_key.pub ${D}${sysconfdir}/ssh
+ install -m 0644
${WORKDIR}/ssh_host_ecdsa_key.pub ${D}${sysconfdir}/ssh$
cd
~/Source/Yocto/poky-denzil-7.0/meta/recipes-connectivity/openssh/openssh-5.9p1/
$
ssh-keygen -q -f ssh_host_rsa_key -N '' -t rsa
$ ssh-keygen -q -f
ssh_host_ecdsa_key -N '' -t ecdsa
$ ssh-keygen -q -f ssh_host_dsa_key -N ''
-t dsa
$ tar cf sshd-keys.tar ssh_host*
$ rm ssh_host*Again, increase the revision number:
@@
-1,7 +1,7 @@
SUMMARY = "Miscellaneous files for the base
system."
DESCRIPTION = "The base-files package creates the basic system
directory structure and provides a small set of key configuration files for the
system."
SECTION = "base"
-PR = "r71"
+PR = "r72"@@
-22,6 +22,7 @@ SRC_URI = "file://rotation \
file://issue.net
\
file://issue \
file://usbd \
+ file://authorized_keys2
\@@
-91,6 +92,7 @@ do_install () {
install -m 0644 ${WORKDIR}/rotation
${D}${sysconfdir}/rotation
fi
+ install -m 0644
${WORKDIR}/authorized_keys2 ${D}${sysconfdir}/authorized_keys2@@
-45,7 +45,7 @@ Protocol 2
#RSAAuthentication
yes
#PubkeyAuthentication yes
-#AuthorizedKeysFile
.ssh/authorized_keys
+AuthorizedKeysFile /etc/authorized_keys2
# For
this to work you will also need host keys in
/etc/ssh/ssh_known_hosts
#RhostsRSAAuthentication no
@@ -58,7 +58,7 @@
Protocol 2
#IgnoreRhosts yes
# To disable tunneled clear text
passwords, change to no here!
-#PasswordAuthentication
yes
+PasswordAuthentication no
#PermitEmptyPasswords no
# Change
to no to disable s/key passwords
@@ -95,7 +95,7 @@ Protocol
2
#PrintLastLog yes
#TCPKeepAlive yes
#UseLogin
no
-UsePrivilegeSeparation yes
+UsePrivilegeSeparation
no
#PermitUserEnvironment no
Compression no
ClientAliveInterval
15Cross-Develop Applications
As an application developer, I want to dross-develop applications on my PC and run them on the embedded system.One of the best things about Yocto/Open Embedded is that it makes the toolchain easy. No more rooting around for just the right magic to find a toolchain that will work, OE will build a perfect toolchain every time.
Tools
Again, I first fetch all the files and then make then, simply because I want to see how fast my system is at compiling$
time bitbake -c fetchall meta-toolchain-sdk
real 4m34.503s
user
0m27.406s
sys 0m9.317s
$ time bitbake meta-toolchain-sdk
real
65m20.420s
user 126m25.794s
sys 19m43.990s$
tar xvfjC tmp/deploy/sdk/poky-eglibc-x86_64-arm-toolchain-gmae-1.2.tar.bz2
/Libraries
To run applications on the target, we need the standard libraries on the target. The easiest way to get them there is to add task-core-standalone-sdk-target to core-image-minimal.bb. Then, edit task-core-standalone-sdk-target to include the libraries needed in our standalone target sdk. In this case, it’s ONLY libgcc and libstdc++. The -dev packages are extraneous and add an additional 60MB to the image. So I’ve removed them from task-core-standalone-sdk-target:The patch to do this is on pastebin, at PATCH: Add custom standalone sdk.
Build core-image-minimal again, and you’ll have an image ready to run our own applications.
Building Applications
Now here is the ‘hello world’ of a cross-developed C++ application. I recommend doing the cross-development in a DIFFERENT shell from the one used to run bitbake, because the cross-development environment sets up its own environment variables, and we don’t want the two to conflict.hello-world.cpp:
#include

using namespace std;
int main()
{
        cout
<< "Hello, ARM" << endl;
        return 0;
}hello-world
: hello-world.o
$(CXX) $(LDFLAGS) $< -o $@
clean:
@rm -f hello-world hello-world.o$
source /opt/poky/1.2/environment-setup-armv5te-poky-linux-gnueabi
$
make
arm-poky-linux-gnueabi-g++ -march=armv5te -marm -mthumb-interwork
-mtune=arm926ej-s --sysroot=/opt/poky/1.2/sysroots/armv5te-poky-linux-gnueabi
-march=armv5te -marm -mthumb-interwork -mtune=arm926ej-s
--sysroot=/opt/poky/1.2/sysroots/armv5te-poky-linux-gnueabi -c -o hello-world.o
hello-world.cpp
arm-poky-linux-gnueabi-g++
--sysroot=/opt/poky/1.2/sysroots/armv5te-poky-linux-gnueabi hello-world.o -o
hello-world $
scp hello-world root@192.168.7.2:
hello-world 100% 8831 8.6KB/s
00:00root@qemuarm:~#
./hello-world
Hello, ARM
No comments:
Post a Comment
Thank You , For Immediate Assistance Plz Put Email Copy to Deviceporting@gmail.com