I just bought a
Pandaboard to
experiment with Embedded Linux. As mentioned in my last post, OpenEmbedded is my
weapon of choice for now, specifically the ‘Poky’ distro from The Yocto Project.
Here’s how to get it started.
Download Poky
First, be sure to get the ‘denzil’ release of Poky. Later versions, including
the latest drops, do not work on Pandaboard. The going theory is that the new
GCC 4.7 botches something when compiling the kernel.
Download meta-ti
The BSP for Pandaboard is in a layer called meta-ti. Importantly, you need a
specific commit from meta-ti which is compatible with the Poky denzil release.
The last line below accomplishes this.
Configure
First, generate the proper build directory:
$
cd ~/Source/Yocto
$ source poky-denzil-7.0/oe-init-build-env
poky-denzil-7.0-build
There are a few tricks to properly configure Poky and meta-ti to play nicely
together. Edit the conf/local.conf file and include these lines at the top:
MACHINE=pandaboard
BBMASK=meta-ti/recipes-misc
Then, edit conf/bblayers.conf and add in the meta-ti layer,so BBLAYERS looks
like this, obviously changing ‘whatever’ to where you really put the files.
BBLAYERS
?= " \
/home/whatever/Source/Yocto/poky/meta
\
/home/whatever/Source/Yocto/poky/meta-yocto
\
/home/whatever/Source/Yocto/poky/meta-ti \
"
That’s it, ready to build!
Build Sato
For this example, I want to have a full UI, so we’ll build the ‘Sato’ image.
Note that I like to do the fetch and build steps separately to measure my system
performance.
$
cd ~/Source/Yocto
$ source poky-denzil-7.0/oe-init-build-env
poky-denzil-7.0-build
$ time bitbake -c fetchall core-image-sato

real
34m37.854s
user 20m12.412s
sys 3m22.473s

$ time bitbake
core-image-sato

real 117m59.545s
user 300m55.588s
sys
45m30.759s
By the way, the fetch time looks excessive. I suspect it’s because I’ve
increased the BB_NUMBER_THREADS too high in conf/local.conf.
Package on SD Card
Finally, we need to take the resulting files and put them on an SD card. Here
are the steps I go through. In this example, I’m using an 8GB card with
precisely 7,969,177,600 capacity. The SD card on my development machine is
located at /dev/sdd. Obviously, make sure you’re using the right value for your
machine!
$
pushd tmp/deploy/images/
$ sudo dd if=/dev/zero of=/dev/sdd bs=1024
count=1024
$ sudo fdisk -l /dev/sdd
Disk /dev/sdd: 8029 MB, 7969177600
bytes

$ echo 7969177600/255/63/512 | bc
986

$ { echo
,9,0x0C,*; echo ,,,-; } | sudo sfdisk -D -H 255 -S 63 -C 986 /dev/sdd
$ sudo
kpartx -av /dev/sdd
$ sudo mkfs.vfat -F 32 -n "boot" /dev/mapper/sdd1
$
sudo mke2fs -j -L "root" /dev/mapper/sdd2
$ sudo mount /dev/mapper/sdd1
/mnt/boot
$ sudo mount /dev/mapper/sdd2 /mnt/root
$ sudo cp MLO
/mnt/boot
$ sudo cp u-boot.img /mnt/boot
$ sudo cp uImage-pandaboard.bin
/mnt/boot/uImage
$ sudo tar -x -C /mnt/root/ -f
core-image-sato-pandaboard.tar.bz2
$ sudo umount /mnt/root
$ sudo umount
/mnt/boot
$ sudo kpartx -d /dev/sdd
Prepare to Boot
The bootloaders and kernel are configured to spew output messages to the
built-in serial connector on the Pandaboard. This is a DB9 connector, which is
silly considering that PCs stopped shipping with serial ports some decades ago.
So be sure to get yourself a USB Serial Connector, hook it up, and launch a
terminal before doing anything else.
$
sudo picocom -b 115200 /dev/ttyUSB0
If you’re using an HDMI monitor, hook that up before booting.
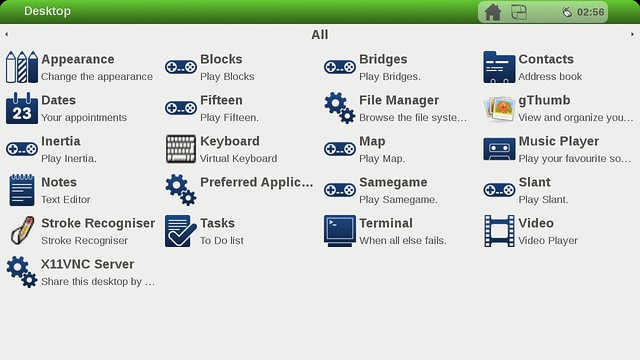
Boot It!
Plug in the SD card, plug in the power, and you’ll see something like the
following on the serial output. 7 seconds later, you’ll have Matchbox up and
running.
U-Boot
2011.12-dirty (Jul 17 2012 - 22:30:55)

CPU : OMAP4430 ES2.3
Board:
OMAP4 Panda
I2C: ready
DRAM: 1 GiB
MMC: OMAP SD/MMC: 0
Using default
environment

In: serial
Out: serial
Err: serial
Hit any key to
stop autoboot: 3 ��� 2 ��� 1 ��� 0
reading boot.scr

** Unable to
read "boot.scr" from mmc 0:1 **
reading uImage

4144980 bytes
read
Booting from mmc0 ...
## Booting kernel from Legacy Image at 82000000
...
Image Name: Linux-3.1.0
Image Type: ARM Linux Kernel Image
(uncompressed)
Data Size: 4144916 Bytes = 4 MiB
Load Address:
80008000
Entry Point: 80008000
Verifying Checksum ... OK
Loading Kernel
Image ... OK
OK

Starting kernel ...

Uncompressing Linux...
done, booting the kernel.
[ 0.000000] Initializing cgroup subsys cpuset
[
0.000000] Initializing cgroup subsys cpu
[ 0.000000] Linux version 3.1.0 (gcc
version 4.6.4 20120303 (prerelease) (GCC) ) #1 SMP PREEMPT Wed Jul 18 09:03:09
PDT 2012
[ 0.000000] CPU: ARMv7 Processor [411fc093] revision 3 (ARMv7),
cr=10c5387f
[ 0.000000] CPU: VIPT nonaliasing data cache, VIPT aliasing
instruction cache
[ 0.000000] Machine: OMAP4 Panda board
[ 0.000000]
Reserving 16777216 bytes SDRAM for VRAM
[ 0.000000] CMA: reserved 32 MiB at
9e000000
[ 0.000000] Memory policy: ECC disabled, Data cache writealloc
[
0.000000] OMAP4430 ES2.3
[ 0.000000] SRAM: Mapped pa 0x40300000 to va
0xfe400000 size: 0xd000
[ 0.000000] PERCPU: Embedded 9 pages/cpu @e0003000
s12512 r8192 d16160 u36864
[ 0.000000] Built 1 zonelists in Zone order,
mobility grouping on. Total pages: 255744
[ 0.000000] Kernel command line:
console=ttyO2,115200n8 vram=16M root=/dev/mmcblk0p2 ro rootfstype=ext4
rootwait

...and so on...

No comments:
Post a Comment
Thank You , For Immediate Assistance Plz Put Email Copy to Deviceporting@gmail.com