
If you use Telegram regularly, you’ve probably heard of bots. They’re like regular accounts, you can talk to them or have them in groups and they’ll do all sorts of useful things for you.
In this post, I present you the shell bot! Unlike other bots, this one is self-hosted: you use it by running your own instance of the bot in your server.
This handy bot runs commands on demand and sends the live output, allowing you to interact at any time. It can even run graphical apps!
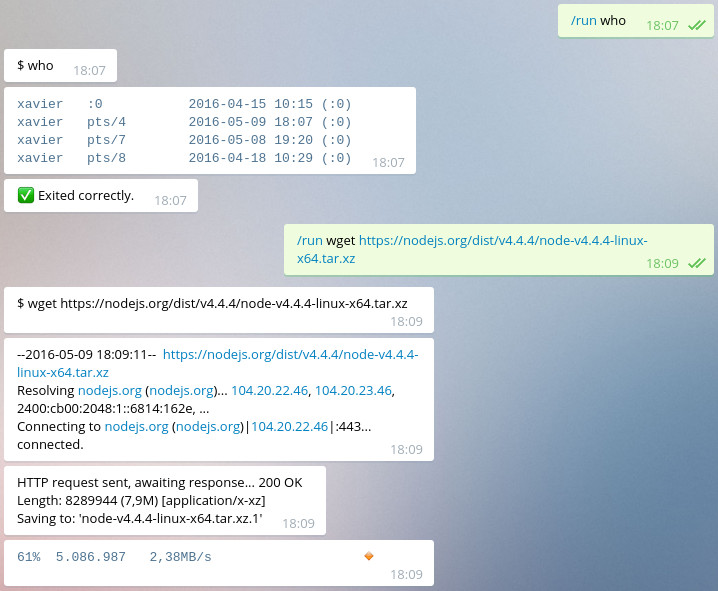
The shell bot running some simple commands.
It was made as an example for the botgram framework, but I’ve been using it for some time and it’s proven to be very useful. When you’re on mobile and just want to issue a few commands, talking to a bot is probably more convenient than opening an SSH app and connecting to the server.

Graphical application example, alsamixer in this case.
It has creative uses as well: I once was troubleshooting a server problem with some friends, so we added the bot to the group and started playing around. Everyone could see what was going on, and suggest possible causes or things to try.
If you want to have your own shell bot, this post will guide you through the process of creating the Telegram bot itself, and installing the necessary software.
Create your bot
First of all, you need to register a Telegram bot. Don’t worry, it only takes some seconds. Click here to talk to the BotFather, then say /newbot and you’ll be asked some things (name, username, etc.). At the end, you’ll be given an authentication token that looks like the following:
123456:ABC-DEF1234ghIkl-zyx57W2v1u123ew11
Preparations
Edit: The bot now lives in its own repository and the installation process has been simplified. If you followed a previous version of this post, remove it and follow these steps from the start.
The following should be done on the computer you want to run commands on. First of all, make sure you have Node.JS installed (you can verify by running npm -v). You’ll also need a working compiler and git:
sudo apt-get install build-essential git
Clone the project and install dependencies:
git clone https://github.com/botgram/shell-bot.git
cd shell-bot
npm install
Then run the bot for the first time, to create the configuration file:
node server
It will ask you a set of questions, including the auth token that you got from the BotFather, and will ask that you talk to your bot (so it can know who his owner is).
Run it!
Now that we have everything set up, we can run the shell bot:
node server
Try saying /run uname -a for example, or say /help to learn about the available commands.
Autostart
Once you’ve played around, you may want the bot to start automatically on boot, and respawn if it crashes. For that, let’s install forever:
sudo npm install -g forever
Then, from your /etc/rc.local or an init script, call:
forever start /path/to/shell-bot/server.js
Also, it’s a good idea to talk to the BotFather and say /setcommands to define a list of commands your bot accepts. You’ll find this list in commands.txt; just paste the contents when asked. You may also want to change the bot’s profile photo and description.
Great job for publishing such a nice article. I am glad to discover this post as I found lots of valuable data in your article. Real mom and son incest porn
ReplyDelete